Composite (Laue and Powder)
The Composite calibration workflow is the most flexible calibration option in HEXRDGUI. Unlike Fast Powder, which works with a single powder overlay, Composite calibration supports multiple powder and Laue overlays simultaneously. This makes it suitable for complex experimental setups where both powder diffraction rings and single-crystal Laue spots are present.
Starting the Workflow
To begin, ensure that the overlays you want to use for calibration are visible in the canvas. You can use any combination of:
- Powder overlays for Debye-Scherrer rings from known materials
- Laue overlays for single-crystal diffraction spots
Then navigate to Run -> Calibration -> Composite (Laue and Powder) from
the menu bar.
Pick Methods
For each visible overlay, you must select how peaks/spots will be identified. The pick method dialog presents options for each overlay independently.
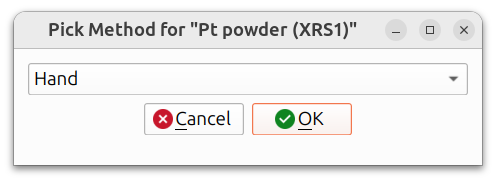
The available pick methods are:
- Previous: Use picks from a previous session or state file. This option is enabled if picks already exist for this overlay (e.g., from a loaded state file or a prior calibration run in the current session).
- Auto: Automatically detect peaks/spots using an algorithm (see below for details on powder vs. Laue auto-picking).
- Hand: Manually pick points by clicking on the canvas.
- Load: Load previously saved picks from an HDF5 file.
Hand Picking
If you choose to hand-pick points, a zoom box will appear, and a cursor will be drawn at the location of your mouse pointer in the canvas.
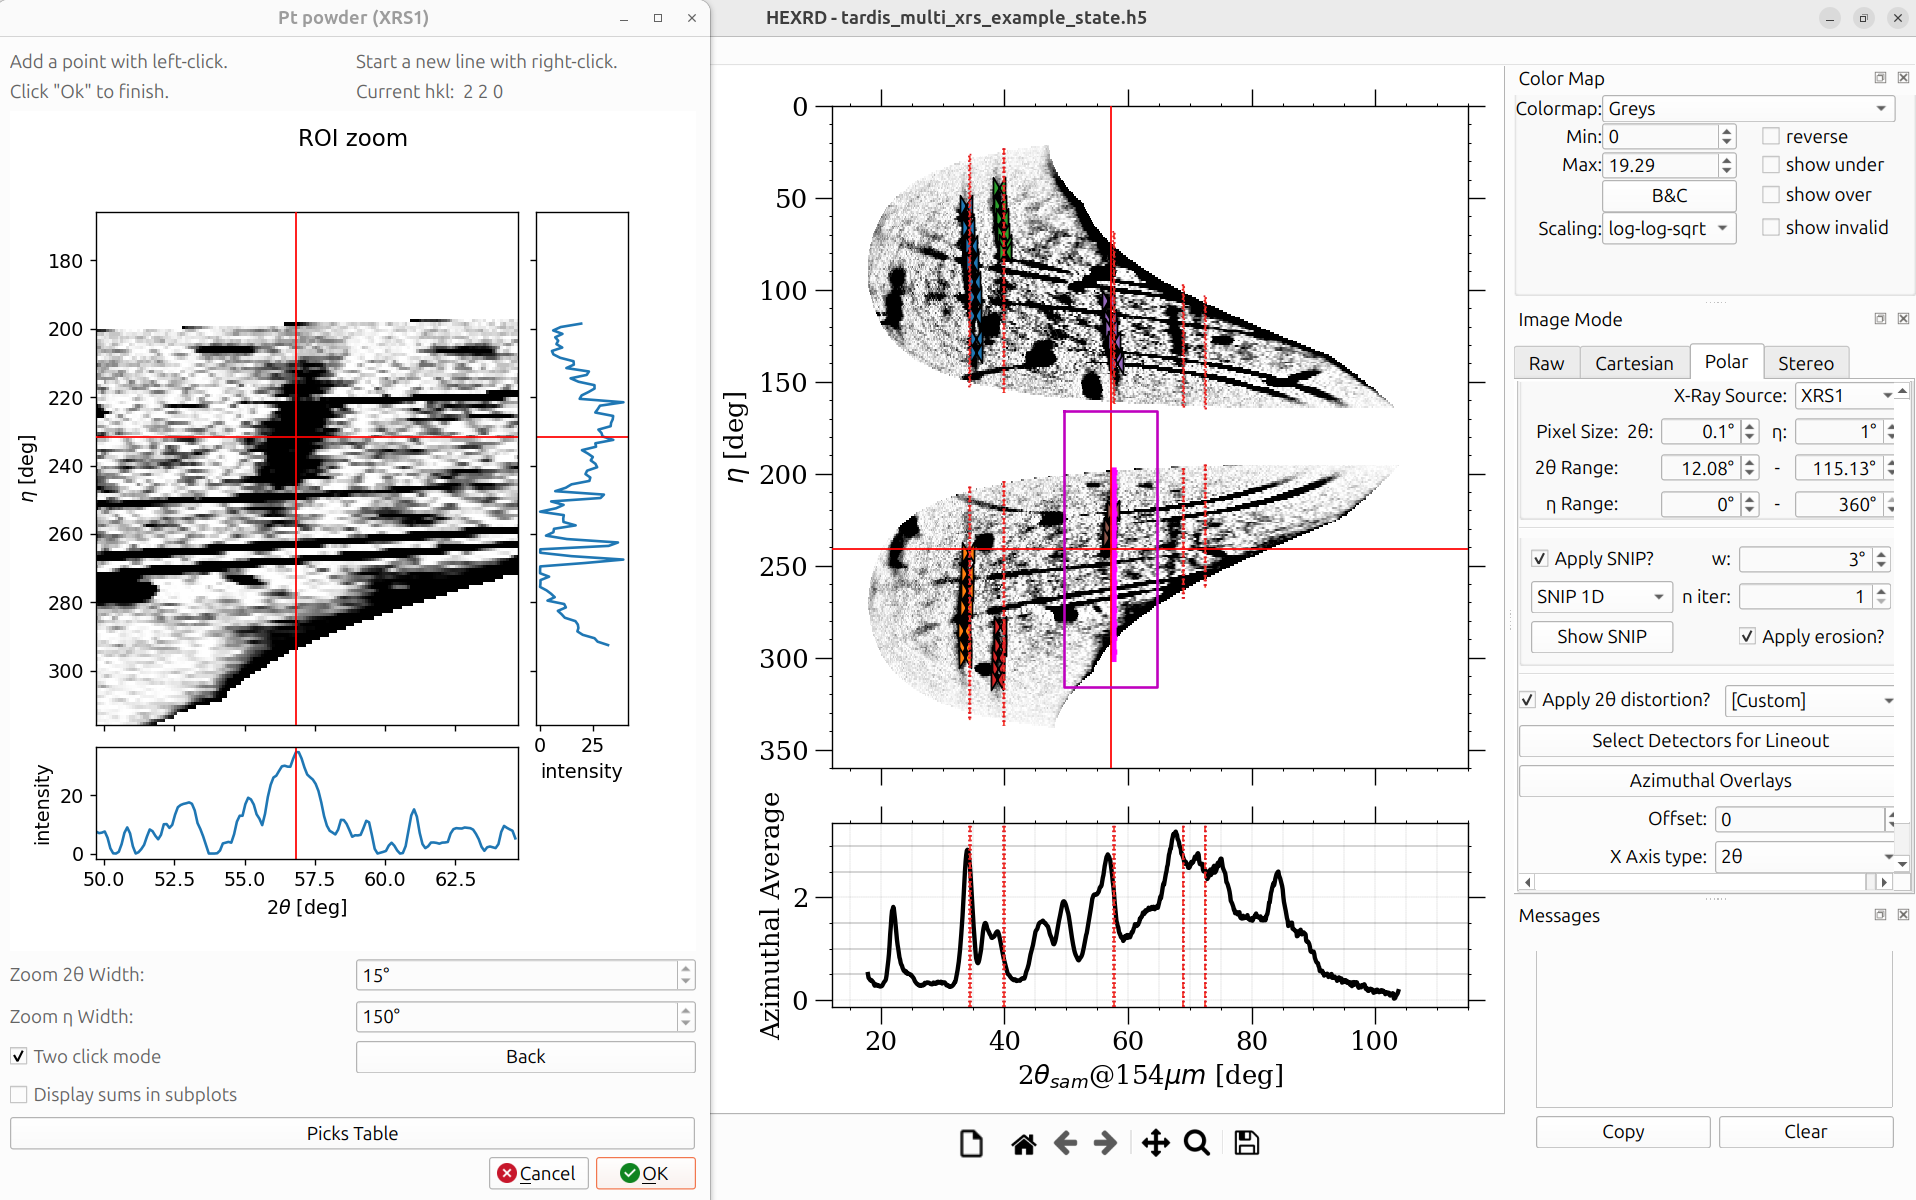
A box is drawn in the canvas that outlines the region displayed in the zoom box. By default, a "Two click mode" is enabled, where the main canvas is left-clicked once to freeze the position of the zoom box, and then a point in the zoom box is left-clicked for the point to be picked. This results in more accurate point-picking, but can be disabled via the "Two click mode" checkbox in the dialog.
Several other options are also available in the zoom box, including options
to modify the dimensions of the zoom box, and a Back button to remove
the most recently picked point. The zoom box also indicates in the labels
at the top which line or spot is being picked.
Composite hand picking highlights a specific HKL line/spot on a specific detector. You pick points only for that particular HKL and detector combination. When you right-click, it advances to the next entry, which may be the same HKL on a different detector, or a different HKL on the same detector. The colors of the cursors and points will change, indicating that a new line/spot is being picked.
Auto-Picking (Powder)
Auto-picking for powder overlays uses the same mechanism as Fast Powder. The data is projected into polar format, and peaks are found within the specified 2θ range.
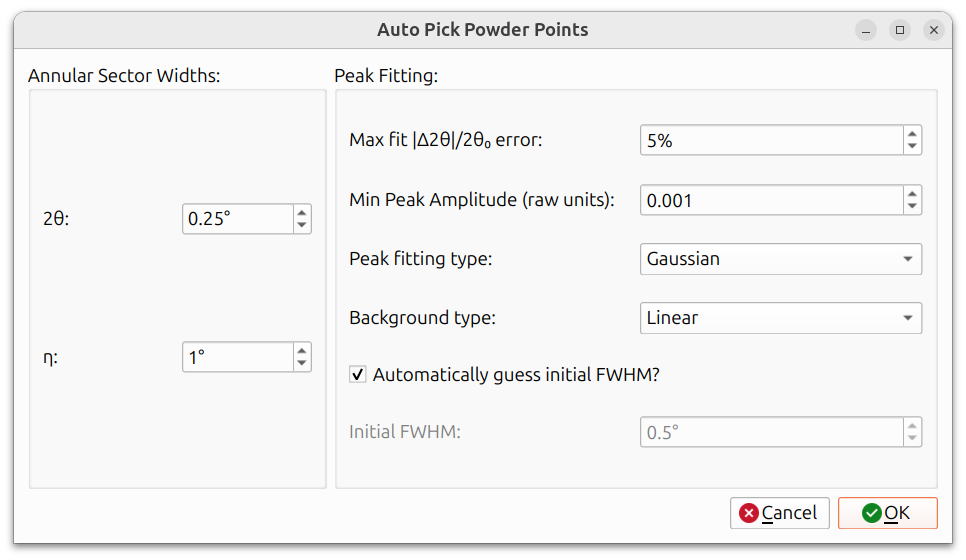
The dialog has two groups of parameters:
Annular Sector Widths:
- 2θ: The width in 2θ around each simulated line to search for peaks. A larger value is more forgiving of misalignment but may pick up spurious peaks.
- η: The angular width in η for each pick. A narrower width produces more picks along the ring but may also produce more invalid picks.
Peak Fitting:
- Max fit |Δ2θ|/2θ0 error: Maximum allowed relative error between the fitted peak position and the expected position. Picks exceeding this threshold are discarded. Expressed as a percentage.
- Min Peak Amplitude (raw units): Minimum peak amplitude for a pick to be accepted. This filters out picks on weak or noisy signal.
- Peak fitting type: The function used to fit each peak (e.g., Gaussian).
- Background type: How the local background is estimated and subtracted before fitting (e.g., Linear).
- Automatically guess initial FWHM?: When checked, the initial FWHM for the peak fit is estimated automatically. When unchecked, the Initial FWHM field becomes editable so you can provide a manual starting value.
Auto-Picking (Laue)
Auto-picking for Laue overlays searches for single-crystal diffraction spots near the predicted locations.
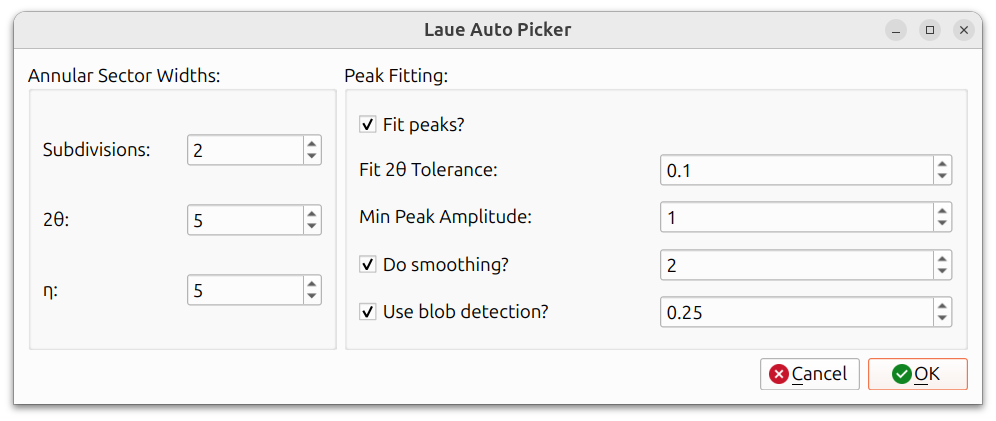
The dialog has two groups of parameters:
Annular Sector Widths:
- Subdivisions: Number of pixel subdivisions for finer search resolution. Higher values search at sub-pixel positions around each predicted spot location.
- 2θ: Search range in 2θ around each predicted spot.
- η: Search range in η around each predicted spot.
Peak Fitting:
- Fit peaks?: When checked, a peak shape is fitted to each detected spot for more precise centering. When unchecked, the raw intensity maximum is used.
- Fit 2θ Tolerance: Tolerance for the peak fitting step. Controls how far from the predicted position the fitted peak center is allowed to be.
- Min Peak Amplitude: Minimum spot intensity for a pick to be accepted. Spots below this threshold are discarded.
- Do smoothing?: When checked, smoothing is applied to the image data before peak detection. The value controls the smoothing sigma.
- Use blob detection?: When checked, spots are identified using a blob detection algorithm rather than simple intensity search. The value controls the blob detection threshold.
Loading Picks
Previously saved picks can be loaded from an HDF5 file. This is useful when you want to reuse picks from a previous calibration session without re-picking. The picks in the HDF5 file are saved using cartesian coordinates (XY coordinates on detectors), so that, unlike polar coordinates, changes in instrument calibration parameters do not affect their location.
Saving Picks
Picks can be exported to an HDF5 file from within the calibration dialog. This allows you to save your picks for later reuse or sharing with colleagues. The picks in the HDF5 file are saved using cartesian coordinates (XY coordinates on detectors), so that, unlike polar coordinates, changes in instrument calibration parameters do not affect their location.
Multiple X-Ray Sources
For instruments with multiple X-ray sources (such as some TARDIS datasets), the picking workflow handles source switching automatically. When picking is in progress and the workflow moves to overlays associated with a different X-ray source, the polar view automatically switches to show the projection for that source. You do not need to manually change the view.
Calibration Dialog
After picks are obtained for all overlays, the calibration dialog appears.
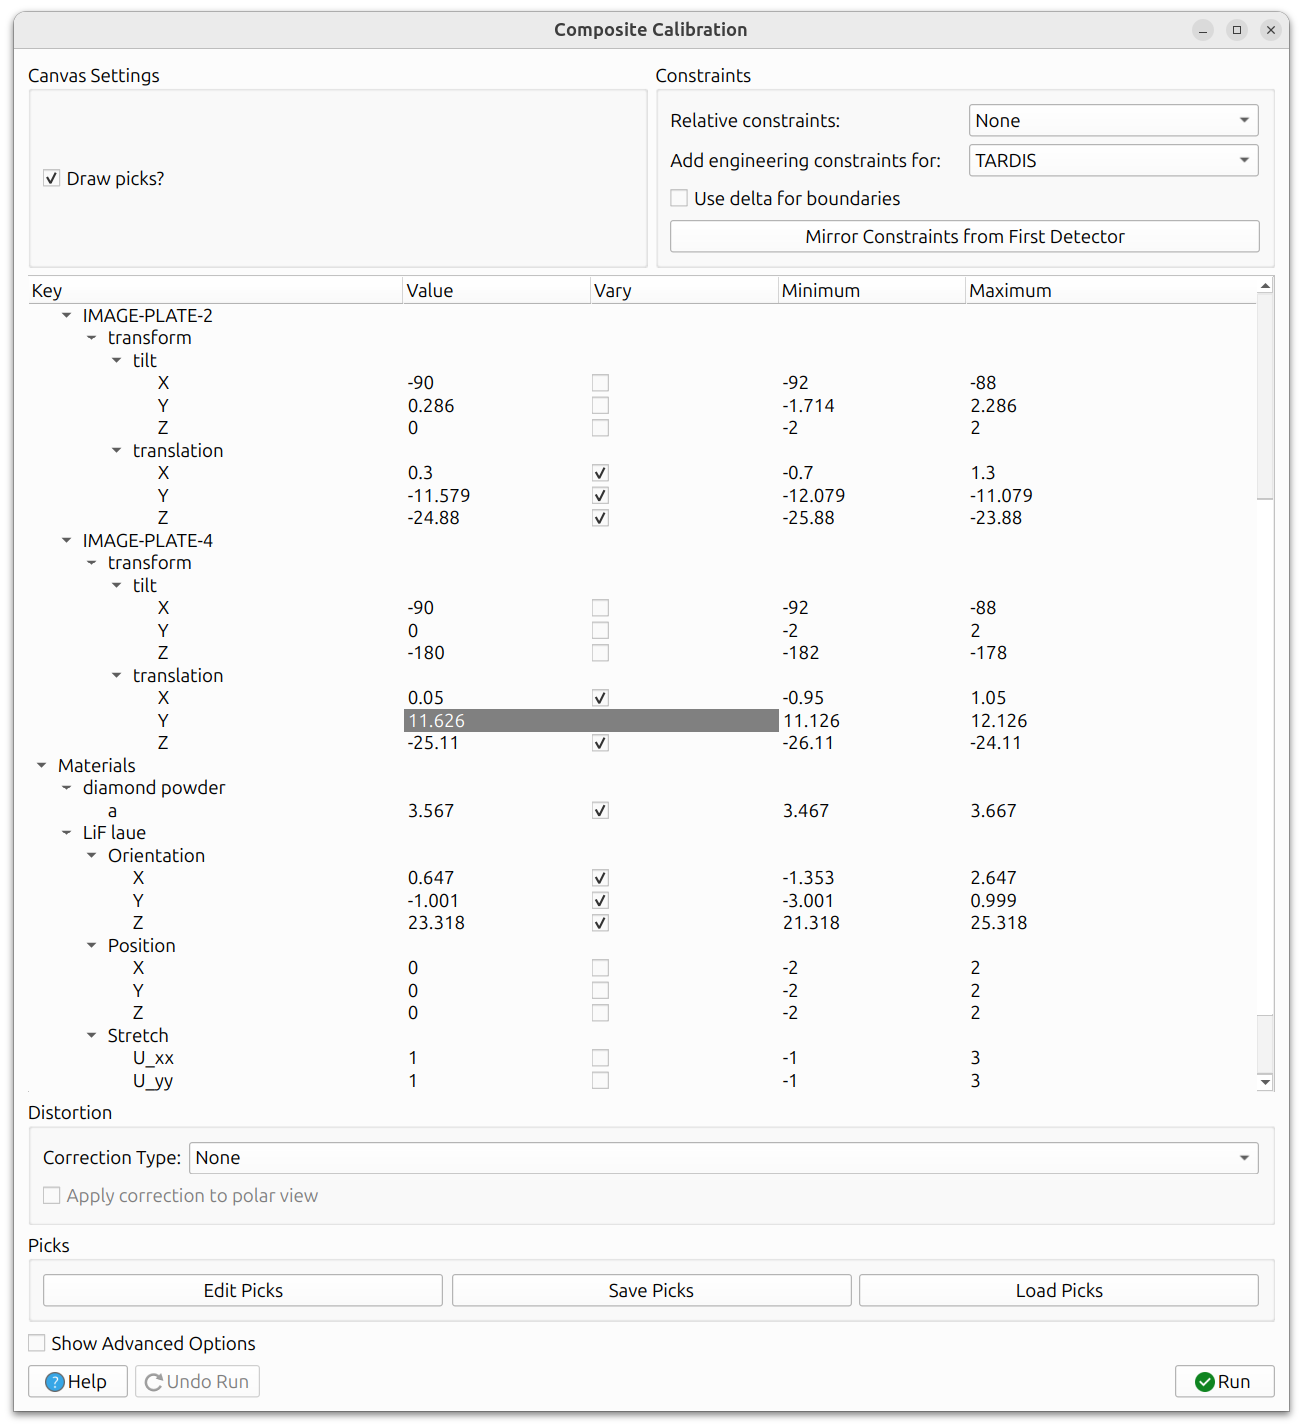
At the top of the dialog are several controls:
- Canvas Settings: The "Draw picks?" checkbox toggles whether the picked points are drawn on the main canvas.
- Constraints: Options for relative constraints, engineering constraints, delta boundaries, and mirror constraints.
The main area contains a tree view with all refinable parameters. Each parameter has columns for Value, Vary (checkbox to mark it for refinement), Minimum, and Maximum bounds.
The tree view is organized into sections:
- Beam parameters: Beam energy and beam vector components.
- Oscillation stage: Chi parameter and translation for the sample stage.
- Engineering constraints: Instrument-specific parameters such as the distance between image plates (for TARDIS).
- Detector parameters (e.g., IMAGE-PLATE-2, IMAGE-PLATE-4): Each detector has tilt (X, Y, Z) and translation (X, Y, Z) parameters.
- Materials: For powder overlays (e.g., "diamond powder"), the lattice
parameters are refinable. For Laue overlays (e.g., "LiF laue"),
the crystal parameters are refinable:
- Orientation (X, Y, Z): The crystal orientation as exponential map parameters.
- Position (X, Y, Z): The crystal position in the sample frame.
- Stretch (U_xx, U_yy, ...): The crystal's stretch tensor, which encodes lattice strain.
This makes Composite calibration powerful for simultaneously refining instrument geometry, powder lattice parameters, and single-crystal parameters.
Below the tree view:
- Distortion: Pinhole distortion correction settings (Correction Type and whether to apply the correction to the polar view). Relevant for instruments like TARDIS and PXRDIP that have a pinhole in the experiment.
- Picks: Buttons to Edit Picks (modify or re-pick individual points), Save Picks (export to HDF5), and Load Picks (import from HDF5).
- Show Advanced Options: Reveals additional optimizer settings. See Advanced Options for details.
- Run and Undo Run buttons at the bottom.
Run and Undo
Click Run to execute the calibration. The optimizer refines all parameters marked with "Vary" to minimize the residual between picked and simulated peak/spot positions. Use Undo Run to revert if the results are not satisfactory.
As with other calibration workflows, an iterative approach works best: refine a few parameters at a time, inspect results, and add more parameters in subsequent runs.
When you are satisfied, close the dialog to finish the workflow. It's then best to save a state file to ensure progress won't be lost.
Example
An example of using the composite calibration workflow can be seen in the FIDDLE tutorial shown below: